Introduction
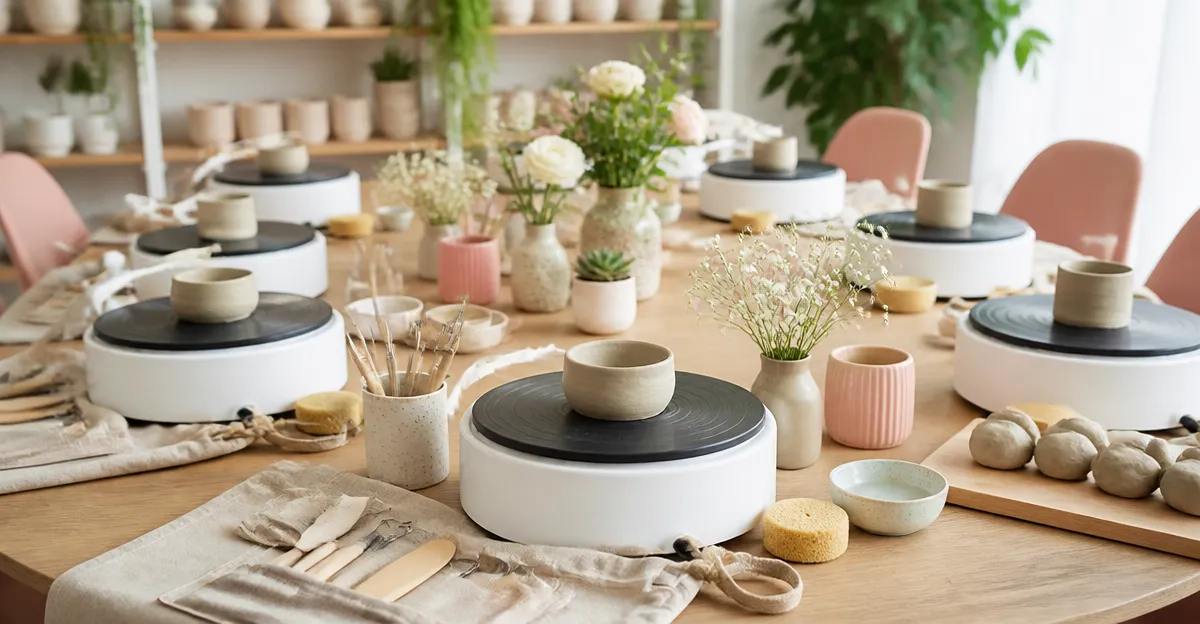
This guide explains how to organize a pottery party that entertains guests of all ages while producing charming miniature creations. The reader will learn fifteen creative DIY ideas, essential setup tips, and a step‑by‑step process that turns a simple gathering into a memorable artistic experience. By following the instructions, one can create a structured yet flexible environment that encourages creativity without excessive mess. The information is valuable because it combines practical logistics with curated product recommendations that streamline the event.
What You’ll Need
- Mini pottery wheels (e.g., Alldeer Mini Pottery Wheel Kit or VEVOR Mini Pottery Wheel Kit)
- Clay sculpting tools (e.g., Blisstime Clay Sculpting Tool Kit)
- Air‑dry clay and optional paint sets (included in the Make It Real Mini Pottery Studio)
- Protective table covers, disposable aprons, and cleaning supplies
- Decorative lighting, music, and refreshments to create a festive atmosphere
Step 1: Choose the Venue and Arrange the Layout
Select a well‑ventilated room with sturdy tables that can support the weight of the wheels and clay. Arrange the tables in a U‑shaped layout so that the host can demonstrate techniques from a central position while guests work at individual stations. Place the mini wheels on the outer edge of each station, leaving at least twelve inches of clearance for arm movement. This arrangement encourages interaction, allows easy monitoring, and reduces the likelihood of accidental collisions.
Step 2: Set Up the Mini Wheels
Unbox the chosen wheel kit and follow the manufacturer’s assembly instructions. For the Alldeer Mini Pottery Wheel Kit, the 6‑inch metal turntable provides a textured surface that grips soft clay, while the 0–300 RPM speed control accommodates both beginners and more experienced users. Secure the removable splash tray beneath the turntable to contain excess water and clay, simplifying cleanup after each session. Test the speed dial to ensure smooth rotation; a quiet motor reduces distractions and creates a calm working environment.
Step 3: Prepare the Clay and Tools
Lay out the air‑dry clay in individual containers to prevent cross‑contamination. If the Make It Real Mini Pottery Studio is used, the included clay is pre‑measured and mess‑free, eliminating the need for additional water. Distribute the Blisstime Clay Sculpting Tool Kit across the stations; its 18‑piece set contains double‑ended tools that save space and provide a variety of shapes for carving, trimming, and smoothing. Emphasize that the stainless‑steel tips are sharp enough for precise work yet safe when handled responsibly.
Step 4: Demonstrate Basic Techniques
Begin with a brief demonstration of centering clay on the wheel, a foundational skill for creating balanced forms. Use the innovative centering tool that comes with the Make It Real Mini Pottery Studio; its ergonomic design reduces hand fatigue and helps beginners achieve a stable mound quickly. Follow with a simple tutorial on shaping a bowl, emphasizing the use of the wooden handles from the sculpting kit for gentle pressure. Encourage participants to practice for ten minutes before moving on to the creative projects.
Step 5: Launch the First Creative DIY Idea – Miniature Bowls
Assign each guest the task of creating a miniature bowl that can hold a single piece of candy or a tiny succulent. The compact size of the wheels ensures that even limited workspace can accommodate multiple bowls simultaneously. Recommend using the fine‑point carving tool from the Blisstime Clay Sculpting Tool Kit to add decorative rim patterns. After shaping, allow the bowls to air‑dry for the recommended thirty minutes before proceeding to the next activity.
Step 6: DIY Idea Two – Personalized Charms
Provide each participant with a small block of air‑dry clay and a set of stamping tools from the sculpting kit. Guests can imprint initials, symbols, or simple geometric shapes onto the clay, creating custom charms that can be attached to necklaces or keychains. The double‑ended tools offer both a stamp and a cutter, streamlining the workflow. Once the designs are complete, let the charms dry completely; they typically harden within two hours.
Step 7: DIY Idea Three – Miniature Planters
Combine the bowl‑making technique with a small planting container concept. After forming a shallow bowl, use a spoon‑shaped tool to carve a drainage hole at the bottom, then smooth the interior walls with the rubber‑tipped smoothing tool. Provide a selection of faux succulents or real tiny seedlings that can be placed in the dried planter. This project demonstrates the practical application of pottery in everyday décor.
Step 8: DIY Idea Four – Decorative Tiles
Roll out a thin slab of clay on a silicone mat and cut it into 2‑inch squares using the cutter from the sculpting kit. Invite guests to press stamps, leaves, or textured objects into the surface to create patterned tiles. Once dry, the tiles can be painted with acrylics included in the Make It Real Mini Pottery Studio and displayed as coasters or wall art. This activity highlights the versatility of air‑dry clay beyond traditional vessels.
Step 9: DIY Idea Five – Miniature Tea Sets
Challenge guests to craft a tiny teacup and saucer pair, using the same wheel for the cup and hand‑building the saucer on a flat surface. The precise control of the VEVOR Mini Pottery Wheel Kit allows for smooth, even walls, while the sculpting tools enable delicate rim shaping. After drying, participants may add a glaze‑like finish using the included paints, creating a realistic tea set for dollhouses or display shelves.
Step 10: DIY Idea Six – Animal Figurines
Provide reference images of simple animals such as turtles, cats, or birds. Demonstrate hand‑building techniques using the wooden modeling tools from the sculpting kit, emphasizing the importance of supporting the clay with a thumb‑sized base to prevent collapse. The sturdy stainless‑steel tips are useful for adding fine details like whiskers or scales. Once hardened, these figurines serve as charming souvenirs from the party.
Step 11: DIY Idea Seven – Mosaic Tiles
After the tiles from Idea Four have dried, instruct guests to break them into irregular pieces and reassemble them into a mosaic pattern on a larger base. The flexibility of air‑dry clay allows broken pieces to adhere with a thin layer of fresh clay slurry. This collaborative activity encourages teamwork and showcases the transformative potential of simple materials.
Step 12: DIY Idea Eight – Miniature Vases
Using the wheel, shape narrow, tall vessels that can hold a single dried flower. The adjustable speed of the Alldeer Mini Pottery Wheel Kit ensures a steady rotation while the user applies gentle pressure, preventing wobble. Finish the vases with a light coat of acrylic paint for a polished appearance.
Step 13: DIY Idea Nine – Personalized Nameplates
Roll out a rectangular slab and carve each guest’s name using the fine carving tool from the sculpting kit. This personal touch makes the party memorabilia unique and functional, as the nameplates can be displayed on a desk or shelf. After drying, a quick brush of metallic paint adds a professional finish.
Step 14: DIY Idea Ten – Miniature Food Replicas
Encourage participants to sculpt tiny replicas of favorite foods, such as cupcakes, pizza slices, or fruit. The variety of tool shapes in the Blisstime Clay Sculpting Tool Kit enables precise shaping of curves and edges. These edible‑looking pieces are excellent conversation starters and demonstrate the artistic range of clay.
Step 15: Final Showcase and Celebration
Allocate the last thirty minutes of the party for a showcase where each guest presents their favorite creation. Provide a simple backdrop and soft lighting to highlight the details of the miniature works. Capture photographs for social media sharing, reinforcing the sense of achievement. Conclude with a brief discussion of cleaning procedures and storage recommendations to preserve the tools for future projects.
Tips & Pro Tips
- Cover the work surface with a reusable silicone mat; it prevents clay from sticking and simplifies cleanup.
- Keep a spray bottle of water nearby, but use it sparingly to avoid over‑softening the air‑dry clay.
- When using the centering tool, apply even pressure and avoid forcing the clay; gentle guidance yields smoother results.
- Store the sculpting tools in the zippered bag that comes with the Blisstime Clay Sculpting Tool Kit to protect sharp edges and prevent loss.
- For vibrant colors, mix two paint shades on a palette before applying to the dried pieces; this creates custom hues.
Troubleshooting
Wheel does not spin smoothly: Verify that the power adapter is securely connected and that the speed dial is set within the recommended range. If the motor hums but the turntable remains still, check for debris lodged in the bearing and remove it gently.
Clay cracks during drying: Ensure the ambient humidity is moderate; excessive dryness can cause rapid shrinkage. Lightly mist the surface with water and cover with a damp cloth for the first hour.
Tools feel dull: The stainless‑steel tips may lose sharpness after extensive use. Sharpen the edges with a fine‑grit sandpaper or replace the tool if the wear is severe.
Conclusion
By following this comprehensive guide, one can host a pottery party that balances structured instruction with creative freedom. The fifteen DIY ideas provide a diverse menu of projects that cater to beginners, children, and seasoned hobbyists alike. Proper use of the recommended mini wheels and sculpting tools enhances efficiency, safety, and the overall enjoyment of the event. Readers are encouraged to apply these strategies, experiment with additional designs, and share their successes with the broader crafting community.
Products Mentioned in This Guide
Frequently Asked Questions
What equipment do I need to host a pottery party with mini wheels?
You’ll need mini pottery wheels (e.g., Alldeer or VEVOR kits), clay sculpting tools, air‑dry clay, and optional paint sets.
Can a pottery party be suitable for children and adults alike?
Yes, the mini wheels and air‑dry clay are low‑mess and easy to use, making the activity safe and enjoyable for all ages.
How much space should I allocate for a pottery party setup?
Reserve a table or countertop for each wheel and a separate area for drying and painting, allowing at least 2‑3 sq ft per station.
What are some quick clean‑up tips after the party?
Wipe wheels with a damp cloth, collect excess clay in a disposable bag, and store tools in a sealed container to prevent drying.
Do I need to purchase a kiln for a pottery party?
No, using air‑dry clay eliminates the need for a kiln; the pieces harden naturally in a few hours to a day.