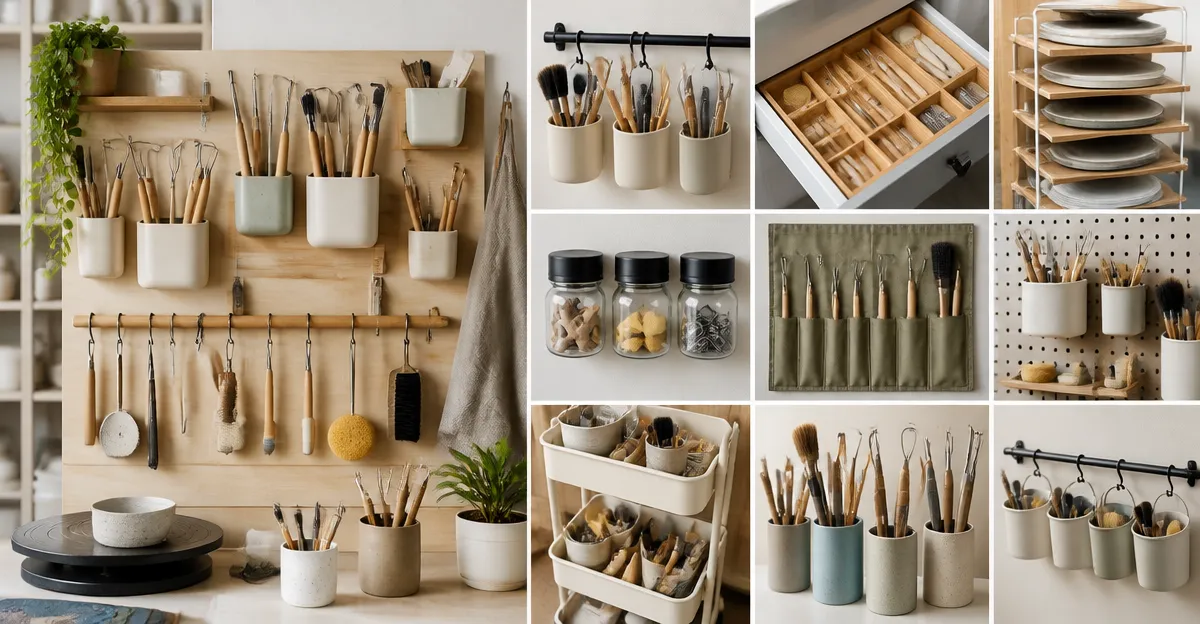
Introduction
In a small pottery studio, every square inch matters. This guide explains how to store pottery tools efficiently while preserving workflow and safety. Readers will learn twenty space‑saving ideas that transform cluttered benches into organized work zones. Implementing these strategies will increase productivity and protect valuable tools.
What You’ll Need
- Stackable tool boxes or modular storage units
- Wall‑mounted racks or shelves
- Portable bucket organizers
- Heavy‑duty hooks, magnetic strips, and drawer dividers
- Labeling supplies and protective padding
Many of these items are available through the recommended Amazon products below, but the concepts can be applied with alternative solutions.
Step 1: Create a Stackable Core with the DEWALT TSTAK System
Begin by establishing a vertical storage backbone using the DEWALT TSTAK Extra Large Tool Box. This box offers an extra‑large volume, removable tray for quick access, and heavy‑duty metal latches that resist rust. At $29.98 and a 4.7‑star rating from 12,642 reviews, it provides reliable durability for power tools, hand tools, and glazing supplies. Stack additional TSTAK units, such as the DEWALT TSTAK II Tool Box, to create a modular tower that can be reconfigured as projects evolve. The bi‑material handle ensures stable portability, allowing the artisan to transport the entire stack from studio to kiln.
Why choose the TSTAK system? Its flexible platform permits different combinations, so a small studio can start with a single box and expand without purchasing new furniture. The removable tray stores frequently used items such as ribbon tools, carving knives, and small spatulas, reducing time spent searching for tools.
Step 2: Mount a SUNALLY 3‑Layer Power Tool Organizer on the Wall
Utilize unused wall space by installing the SUNALLY 3‑Layer Power Tool Organizer. This heavy‑duty iron rack supports up to 150 lb per shelf, features four drill holders, and includes hexagonal expansion bolts for secure mounting. Priced at $22.49 with a 4.7‑star rating from 913 reviews, it offers a cost‑effective solution for hanging glaze mixers, rotary tools, and battery packs. The three layers create distinct zones: upper tier for lightweight hand tools, middle tier for medium‑weight power tools, and lower tier for bulk items such as sandpaper and buckets.
The organizer’s floating design keeps tools off the bench, freeing workspace for throwing and hand‑building. Installation requires only a few minutes, and the removable design allows re‑arrangement when new tools are acquired.
Step 3: Install a POKIPO Wall‑Mount Tool Organizer with Integrated Power Strip
For studios that rely on electric tools, the POKIPO Wall‑Mount Tool Organizer combines storage and charging in a single unit. Constructed from industrial‑grade metal, it bears up to 600 lb, includes a four‑outlet power strip with a 6.5‑ft cord, and offers four tiers of shelving, drill slots, and hook racks. At $65.99 and a 4.5‑star rating from 1,521 reviews, it is a robust investment for power‑intensive studios.
Mount the organizer at bench height to keep chargers and batteries within arm’s reach. The integrated power strip eliminates the need for extension cords, reducing tripping hazards. Heavy‑duty construction ensures that even large electric kilns or spray guns can be stored safely.
Step 4: Deploy a Bucket Boss Bucketeer for Mobile Tool Carrying
When moving between workstations, the Bucket Boss Bucketeer Tool Organizer transforms a standard 5‑gallon bucket into a portable toolbox. Made from poly rip‑stop fabric with 30 pockets and three interior loops, it accommodates hammers, pliers, screwdrivers, and even a small drill. Priced at $16.48 and rated 4.8 stars by 12,125 reviewers, it offers excellent value for on‑the‑go artisans.
The Bucketeer’s open‑pocket design allows quick visual identification of tools, while the loops secure long‑handled items such as chisels. Because it fits a common bucket, the organizer can be paired with a wheeled bucket cart for effortless transport across large studio floors.
Step 5: Use Magnetic Strips for Small Metal Tools
Attach stainless‑steel magnetic strips to the side of a workbench or the interior of a wall rack. Small metal tools such as scrapers, wire cutters, and metal ribs will cling to the strip, keeping them visible and preventing loss. This method requires only adhesive backing and does not interfere with the stacking capabilities of the TSTAK system.
When combined with the removable tray of the DEWALT TSTAK Extra Large Tool Box, magnetic strips provide a hybrid solution that separates frequently used items from bulk storage.
Step 6: Incorporate Adjustable Drawer Dividers
Install adjustable dividers inside the lower drawers of the TSTAK II Box to create custom compartments for glaze brushes, carving tools, and measuring devices. Dividers can be repositioned as tool collections evolve, ensuring that the storage layout remains optimal.
Dividers add structure without adding weight, preserving the box’s 66‑lb load capacity while protecting delicate tools from damage.
Step 7: Hang a Pegboard Behind the Kiln
A pegboard mounted on the wall behind the kiln provides a versatile grid for hooks, baskets, and small shelves. Use heavy‑duty hooks to suspend glaze containers, spray bottles, and hand‑built molds. The pegboard’s open design encourages visual inventory, reducing the time spent searching for specific items.
Pair the pegboard with the SUNALLY 3‑Layer Organizer to create a layered storage hierarchy: the pegboard holds bulk items, while the organizer shelves store medium‑weight power tools.
Step 8: Store Kiln Shelves Vertically in a TSTAK Box
When kiln shelves are not in use, nest them vertically inside the DEWALT TSTAK Extra Large Tool Box. The removable tray can hold smaller kiln accessories, while the main compartment accommodates the stacked shelves. This protects the shelves from dust and damage while freeing floor space.
Because the TSTAK system is stackable, additional boxes can be placed above the shelf storage box, creating a compact tower that occupies only a fraction of the studio’s footprint.
Step 9: Use a Rolling Cart for Bulk Materials
A small rolling cart equipped with a top shelf can hold bags of clay, water containers, and spare tools. Position the cart near the workbench to reduce the distance tools travel during a session. The cart’s mobility allows it to be tucked under a bench when not in use.
Combine the cart with the Bucket Boss Bucketeer for a hybrid solution: the cart carries bulk items, while the Bucketeer provides immediate access to hand tools.
Step 10: Label Everything for Rapid Retrieval
Apply durable, water‑resistant labels to each storage compartment, drawer, and shelf. Use a label maker or printable vinyl tags. Consistent labeling reduces the cognitive load of remembering where each tool resides, especially in a multi‑step workflow such as throwing, trimming, and glazing.
When labels are placed on the removable tray of the DEWALT TSTAK Extra Large Tool Box, the artisan can quickly locate carving knives or ribbon tools without opening multiple boxes.
Tips & Pro Tips
- Rotate tools based on frequency of use; keep daily essentials within arm’s reach.
- Protect delicate tools with foam inserts or soft cloths inside the TSTAK boxes.
- Periodically declutter; remove broken or obsolete tools to maintain an efficient system.
- Secure wall‑mounted units to studs or use appropriate anchors to prevent accidental falls.
- Consider a dust‑proof cover for the Bucket Boss Bucketeer when storing in a dusty environment.
Troubleshooting
Problem: Wall organizer feels unstable after loading heavy tools.
Solution: Verify that expansion bolts are anchored into wall studs and that the weight does not exceed the manufacturer’s specified limit (150 lb per shelf for the SUNALLY organizer, 600 lb total for the POKIPO unit).
Problem: TSTAK boxes become difficult to lift when fully loaded.
Solution: Distribute weight evenly across stacked boxes and use the bi‑material handles to maintain balance. Consider reducing load to stay within the 66‑lb rating of the TSTAK II box.
Conclusion
By applying these twenty space‑saving ideas, a pottery studio can achieve a tidy, efficient environment without sacrificing functionality. The combination of stackable TSTAK boxes, wall‑mounted organizers, portable bucket systems, and thoughtful labeling creates a modular storage network that grows with the artist’s needs. Implementing these strategies will streamline workflows, protect valuable tools, and ultimately enhance creative output.
Products Mentioned in This Guide
Frequently Asked Questions
How can I maximize vertical storage in a small pottery studio?
Use stackable systems like the DEWALT TSTAK to create a vertical core that keeps tools organized and off the bench.
What are the benefits of wall‑mounted racks for pottery tools?
Wall‑mounted racks free floor space, keep frequently used tools within reach, and reduce clutter on work surfaces.
Can portable bucket organizers be used for wet pottery tools?
Yes, bucket organizers hold brushes, sponges, and small tools, keeping them dry and easily transportable around the studio.
How do magnetic strips help with tool storage?
Magnetic strips securely hold metal tools such as scrapers and knives, making them visible and quickly accessible.
Is labeling necessary for a modular storage system?
Labeling each box or drawer speeds up tool retrieval and ensures everyone in the studio knows where items belong.